Posts

Showing posts from 2015

My Filofax: Unboxing the New Limited Edition Original Filofax "Jack"

Image
Oh, how I have dreamt of having a Filofax of my very own!  Well, I finally bit the bullet and purchased one from the Filofax website and it's HERE!!  I'm sooo excited to share the unboxing with you!!!  PS: If you aren't into reading all about it, I've created a YouTube video for you!  So go ahead and have a peek, if you'd like.  For those that enjoy reading about it, scroll down a wee bit and I've got you covered too. .............. A sneak peek inside the box My little jewel is nestled nicely in her cardboard box.  Let's unwrap her .... (Okay, okay ... yes, her  name is "Jack", but I just love referring to him as  her.   You can best compare my love of her with a man and his car, I presume ;) "Jack" still wrapped in the protective plastic sheet Ta-Dah! Isn't she beautiful?!   I fell head over heals for this baby, as soon as I saw her on the website .  She is the crème de la crème of this years Fi

Distressed Vintage, Feminine Birthday Card

Image
I was asked to create a fun and feminine birthday card, and so what did I decide to do?  Well, my signature wallpaper style card, of course! I love this style of card, so much so, that you will be seeing many, many more to come on the blog.  You've been warned ;D Images:  Stampin' Up!  &  Sizzix A little filigree is THIS girl's best friend!   The fun filigree on this card is from  Sizzix  and  Stampin' Up!  (my go to paper crafting companies, because they have amazing  Angel Policies ).  If the pink ribbon, bows, and pins aren't enough for you, the subtle heat embossing gives this card even more of a feminine flair as well as a little extra shine. Images:  Stampin' Up!  &  Sizzix Let me know what you think.  I'd love to hear from you and don't forget to have a wonderful day! Sincerely, Mrs. Rasberry & the Fur Berries

Special Order: Unicorn Birthday Decor

Image
One of our lovely friends asked for a favour.  She requested that I make unicorn themed thank you tags and cupcake flags for her daughter's 4th birthday.  To say the least, I was thrilled to pieces by this!  Having a little boy does not usually leave much room for unicorns and pink glitter foam at The Rasberry Patch, so I dive in head first when an overly girly opportunity comes my way and this is no exception!! Unicorns here we come!!! Images by Stampin' Up! & Flonz I knew that I wanted to do something special and I had decided a long time ago that banners were well worth it for party decor.  You just can't go wrong with a sweet banner, now can you? It was not specifically requested, but I just had to make a beautiful banner for this sweetheart of a lady that I happily call my friend. Images by  Stampin' Up!  &  Flonz Pink glitter foam was the perfect fit for this purple and pink themed party.  The unicorns have been stamped and fu

Retro Butterfly, Happy Birthday Card & VIDEO TUTORIAL: Making Butterflies 3-D with Flocking

Image
We have a fun retro card and a new video tutorial for you today on the blog! Hope you enjoy.  Card Front Images used: Stampendous , Stampin' Up! ,  Accord Publishing &  Momenta This card was requested by a friend of mine who wanted a mason jar themed birthday card.  Hmm ... what to put inside a mason jar?   Flowers?  Nah, did that already.   Sand?  Not really feeling it.   Uh-huh!  A butterfly!  Perfect. The thought of a butterfly trapped inside a mason jar really does appeal to me and my love of nature.  With the knowledge that my friend enjoys a more retro feel to her decor, I had a plan and it was time to create!  Sadly, I found out after the fact, that she absolutely HATES doilies.  Well, I guess that I should have double checked with her about that, but hey?!  I could be cruel and continue to use them on her cards for my own personal entertainment in the future ... mmwwwahaha! Card Front Close-up Images used: Stampendous , Stampin' U

Cheers to You, Happy 60th Birthday Card

Image
This was a fun card to create for a friend of mine.  She had asked for something along the theme of wine or travel.  I chose wine, since I knew that I had the perfect stamp set: Stampin' Up!'s Happy Hour! While digging through my patterned paper, I came across this fun background print.  The paper is from an old scrapbook calendar that I had been given by another good friend of mine.  She had no use for an outdated calendar, but thought that the papers inside were right up my alley.  Boy, was she right?!  I just love the simplicity of this print as well as the imperfect, hand drawn affect of the striped lines.  It seems, to me, to make this card more personal. Card Front Images from Stampin' Up! & Accord Publishing's 2012 Scrapbook Calendar  Since the recipient of this card is a wine connoisseur, I chose to create a wine glass tag to use as an embellishment on the card front.  This means that the card (or parts of it) play double duty.  The wine glas

Vintage Golf, Maculine Birthday Card

Image
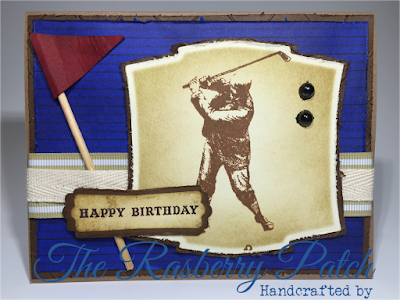
This was a fun card created for my father.   Happy Birthday Dad!! My father is an avid golfer as well as one heck of a history buff, so the vintage golf theme seemed like a perfect fit for a handmade birthday card.  I just loved putting this vintage inspired card together for him.   Card Front Images from  Flonz ,  Stampin' Up!  &  Spellbinders   When I was flipping through my stamp collection, I fell in love, all over again, with this vintage golfer image and I knew that I wanted it to take centre stage on the front of this birthday card.  The vintage golfer is a stamp from  Flonz Craft , a New Zealand based company.   Flonz Craft produces some of the most gorgeous stamps that I have come across so far and I would highly recommend checking them out if you are at all interested in vintage imagery. Card Interior Images from  Flonz  &  Stampin' Up!  The inside of the card is layered and stamped using a wonderful sentiment from  Stampin' Up!   A

Faux Journal, Distressed Wedding Card

Image
Wedding bless are in the air this summer!! The Rasberry Patch was asked to create a card that was both unique and special, for a bride and groom who plan on getting hitched this month. By unique and special, I thought ... hmmm ... VINTAGE!! As many of you already know, I am in LOVE with anything vintage.  Old books and journals are so beautiful and I absolutely love the look, feel, and even smell of those old relics.  Time to create something faux, fun, and fabulous!! Card Face  The card face is made to look like an old antique journal that has seen loads of love and handling.  The body of the card is made of embossed paper that has been distressed with greens and browns to give it a warm and heavily used feel. I am not sure if you would call this technique faux leather or faux wallpaper, but it is definitely faux vintage. The cover is adorned with a distressed die cut lock and vintage keys.  The card is bound using faux leather straps. Inside Cover

Celebrate You, Happy Birthday Card

Image
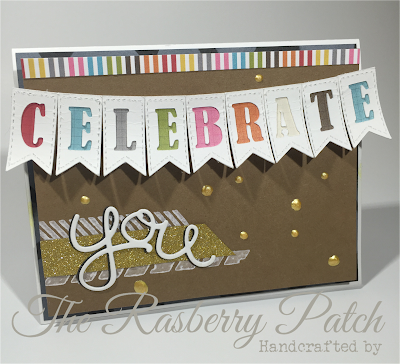
This was a fun little card that I had originally created as an anniversary card, but thought it would make a perfect Happy Birthday card. What do you think? Images from Stampin' Up!, Simple Stories, and The Rasberry Patch  I finally got a chance to use some of my own images in the creation of this card.  The "Celebrate" banner, dotted background, and "Happy Birthday" sentiments were created by me using an electronic die cut machine, handmade templates, and the computer.  I think that I will continue on creating and using my own imagery on cards in the future.  It was so much fun and pretty easy using the tools that we have on hand in the craft room. Have you tried creating your own imagery for any of your crafty adventures? Images from Stampin' Up!, Simple Stories, and The Rasberry Patch Thank you everyone for checking out another card creation post here at The Rasberry Patch.  We wish you a wonderful and crafty weekend. Sincerel

Special Order: Jamberry Thank You Cards

Image
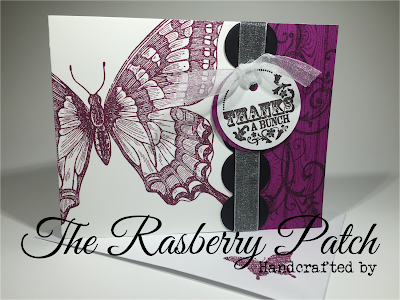
The Rasberry Patch received a special order this week.   We were very pleased to have been asked to design and create 20 Thank You cards for our wonderful friend who has just become a consultant for Jamberry Nails !! Way to go Judy!! We wish you the best of luck in your new business!! By request, these cards were designed to be simple, elegant, and feminine. Our only hope here at The Patch, is that Judy's customers will enjoy these Thank You cards half as much as they enjoy those fabulous nail wraps. Images from Stampin' Up! The colours chosen for these two cards coordinate with the Jamberry Nails colour theme: a wonderful raspberry, white, and classic black.  Judy enjoys a little sparkle and shine, which is reflected in the use of ribbon and tulle in the designs.  She also loves the Stampin' Up! butterfly images, which became the focal points of both cards. Images from Stampin' Up!  I must admit, Stampin' Up!'s retired Tastefu

Shabby Chic, Happy Birthday Card

Image
A wonderful little girl in our life just turned 1!!  That meant that it was time to create a fun little card for a sweet little lady.  This shabby chic card was born from loads of layers and love. Images used in the creation of this card are from  Flonz Craft ,  Sizzix , Stampin' Up! , and Tim Holtz Idea-ology Card Front The embellishments were especially well received by this little lady.  She didn't much care for the handwritten inscription, but she sure did enjoy the beaded ribbon on the card front.   Go figure ... hahah Inside Panel The inside panel was left clean and simple to allow for a handwritten inscription (added after the photo had been taken) and to ensure that the card front took centre stage in this project. This was most definitely a labour of love, as making cards for personal friends is something that I enjoy doing the most.  There is just something so rewarding about making someone you have known for years (in this case: the mo

Converting Stamps From Wood to Cling Mount

Image
Click on the link to watch the tutorial >>  QUICK & EASY VIDEO TUTORIAL  << How to transfer your  wood mount stamps to clear or cling mount .   Clear or cling mount stamps can be used with an acrylic block or stamp press and take up far less room than wood mount stamps.  The process of re-mounting can be time consuming, but it is very easy.  All you need to get started are a few tools and some time.  Why not curl up in front of the TV, watch your favourite show, and sip a cup of jo while you work? Tools: EZ Mount Cling Foam Scissors Sharpie Clear Acrylic Block Baby Wipes Optional Tools: Adhesive Remover StazOn Ink Removable Adhesive Hope you enjoy the video and please let me know if you have any further questions.  I would be happy to answer them to the best of my ability.  There will be many more tips and tricks for re-mounting in an upcoming video tutorial, so please stay tuned.  Thank you everyone and

About Us

Image
Disclaimer : " Rasberry"  is a family name, but we just love being able to use the family raspberry patch for photo shoots. In case you were wondering about the spelling ... haha! Hello everyone, I am Mrs. Rasberry, a hobby crafter, wife, and mother of a wee little berry.  I enjoy creating custom cards, invitations, home décor items, party décor , mixed media canvases, banners, signage, etc. for all kinds of events, celebrations, holidays, gifts, and so on.  Crafting has always been a part of my life and now, thanks to my wonderful husband Big Berry, I have the chance to take crafting to a whole new level with video tutorials, blog posts, custom creations, and many many more things. If you have any custom requests or questions, please feel free to contact me. The Rasberry Patch is a one-woman show, so please allow some time for me to get back to you.   The Patch is a labour of love, and I quite enjoy taking my time to create meaningful crafts, thoughtful posts,